quarta-feira, 3 de junho de 2015

DIGITAL FABRICATION

Hi,

     Today I will talk about Digital Fabrication, in especial of  the 3D print. This is a new technology that have been introduce not only for engenieers or architecture but in differents areas like  medicine, in studies about artificial orgns etc.

     But the lesson for this week was print a model. We could do in sketchup, 3d max, blender, etc or import a moldel alrady done. How I am in the final week of classes and tests I choose to downloader a done model.

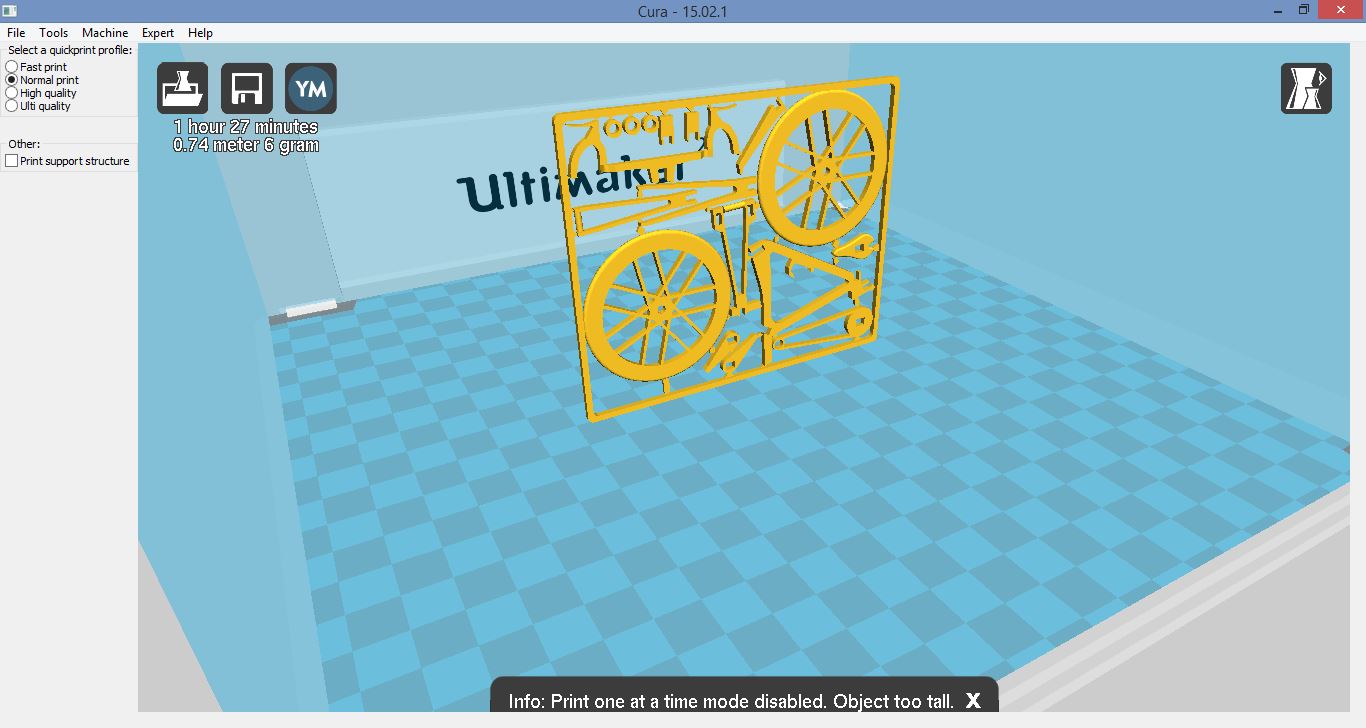
     In the site http://www.thingiverse.com/ I found a extensive free library of models. I choose a model of a bike. The model is a card with the elements of the bike separated to after print assemble it.

     To open the download file I needed to the Cura program, so I such in the internet and downloader too.


     To print a object the virtual model has to been perfect without mistakes. So we have to check. In the Cura the mistakes appear in red and the rest of the model in yellow. I rotate my object to find some mistakes but it was ok.


     When I open the file a mensage appears how we can see in the image above: The object is too tall to print. So I use the scale tool to resize my model. When I resizemy model the program automaticaly recalculates the time of print.


     To see how the model will be printed I select the Level tool. 


   When I finish the modifications I generate a Gcode. This code is the one that will be permite the virtual informacions pass to the 3D printer and the object print. This Gcode have to be copy to a card and insert in the 3D machine. 


    Unfortunately the prints machines in the university are broken but I find the model finished in the site.


quarta-feira, 22 de abril de 2015

IMAGE EDITING

Hi,

In the last weeks we have been learn about programs to edit images. The great potencial of this tools and how the edit can change completely the original image.

In class we saw a little of the tools of the GIMP and your potencial.

The activity for this subject was do a manipulation of images with free theme and free software (GIMP or Photoshop).

I choose do an Unusual day at the beach and use the Photoshop because I had use before to improve my projects. I didn't know how to use very well but I was already familiar with its layout.

Well, I start my work doing some tests. Not very good but to learn more the tools.


After this fails tests I start to work in my final image. I start with a simple image:


I sought other images that could compose this image.


I started removing the sky of the image. And addinga photo of a storm sky.


Little by little I added other elements. Using the tool "magic wand" and the polygon lasso to separate the elemets from your original photos.


While I was adding new elements, also was setting the size (not to be disproportionate), the lighting (to adapt to stormy climate), etc. With this exercise I could improve my knowledge on editing image and learn several diferents tools. This is the final result:

An unusual day at the beach


quarta-feira, 25 de março de 2015

BIM TOOL

    This lasts weeks in the asigment of Digital Tools we learn about the BIM's systems: ARCHICAD, REVIT, VECTORWORKS, etc.

    With this programs we can do the project in 2D and 3D at the same time. But the most valious advantage is to calculate the costs of the project. You can list all the custs of each element and steps of the project. And compare, do plans, schedule, etc.

    The activit of this theme is to do in Archicad some build. I choose the same house I've been doing since Autocad, the NM HOUSE.


    With the other programs (Autocad and Sketchup) I had a prevew knowledge, because I learned in my university in Brasil and works like a trainee. But I never use Archicad so I have some difficult.

    I start the activit watching video tutorials. When I start to undestand the tools I begin the draw.
Firts I start with the walls. I forgot to take prints of the steps but I will explain more o less. I have some problems to join the walls and to extend some times. But finaly I do all the walls from the ground floor. 


   In Archicad you go from the 2D for 3D with a click so I always went to the 3D to watch how it look like.
   
    When I was doing the walls from the first floor I depair wit a problem; do sloping walls. I surch in the tutorials and ask to the professor and finaly I got! To do the sloping walls I had to do the roof, so when I got the roof was also completed. So I start to do the windows and doors. This part was realy dificult! Some windows and doors, you see in the pictures, have the corner glass. So I had to look hard to find some tutorial that teach this. After many hours I got too!! So I finish the openings.
The next step was put the forniture. I have to configurate some things but was quite fast. The materials I did at the same time I was build the elements. I had some problemwith the windows and doors again, but I get change the materials of them.


    When I finished all the model I did the layout. The professor explain in class, like several other things but I can't remember much. So I again look to the tutorials. I can't remember and I could find how to take off the dimensions line from a specific layout, so this part of the activit was missing. 

    At the end I put cameras and some liths (what didn't work very well), make images and render. The internal render I had to clear in photoshop but I will learn how to use the lights in another opportunit. 


Well this is the final result. I hope you enjoy, Until next time.


The layout.


quarta-feira, 4 de fevereiro de 2015

LEARNING 3D TOOLS

In the classes about the 3D technology we learned about the differents digitals tools presents in the market and a little about the process of each program (Sketchup, Blender or 3D Max)

In architecture this tool can be used for differents proposites. Like tool to project, to study the volume, to show the project to a client, etc.

In this homework we have to draw a house. Could be the same house used in the last homework (CAD exercise). And we can o choose the program, Sketchup, Blender or 3D Max. I choose the sketchup because I've been use since Brasil.

My house is the NM House.


To start to draw I firs get the CAD drawing and cleaned it. Remove the differents layers, colors and texts:


After this, I opened the Sketchup and imported the clean file. 


I start to draw creatting layers. Gradually I was covering the lines of the imported file.


At the same time I draw, start to put in layers and added texture. This facilitates to see the differnts elements.


The most part of elemests I draw and make a group or a component, how the chimney, the windows,the doors, the stair, etc. With repetitives elements the best are the components, because after you copy you can change one element and will change all from the same component.


The stairfor exemple is a block where each element is a component. All the steps are derived from one componet, copied many times. The windows are componets too, and their elements either.


I also use blocks already done download from the web, like the sofa, the table and the vet.


Atthe last I put the roof and did the verend.


 Finished all the 3D I did some scenes from the point of viewof a person and take images. 
 Thisis the final result.